

If you’ve ever stood up from a chair and felt your knees “announce themselves,” or rotated your neck after a long day and heard a sound that didn’t exist in your twenties, you already understand the premise: joints don’t age quietly.
And yet the internet’s advice for “joint health” often swings between extremes. Either it’s a spa-like promise—do this stretch and float through life pain-free—or it’s a hard-core sermon about lifting heavy no matter what your body is telling you. Most people live somewhere in the middle: they want to feel better, move more easily, and keep doing what they love without turning every workout into a negotiation.
Resistance bands—those deceptively simple loops and strips of rubber—can be an unusually good tool for that middle ground. They’re gentle on joints because they don’t load you abruptly. They build strength through a controlled range of motion. They reward slow, precise reps. And, perhaps most importantly, they make it easier to train the smaller stabilizing muscles around major joints—hips, shoulders, ankles—without needing a room full of equipment.
“Feel younger” is obviously not a medical claim. But there’s a very real sensation that comes from moving better: less stiffness, more control, fewer cranky joints that complain after sitting too long or climbing too many stairs. The goal of the 10 exercises below is simple: strengthen the muscles that protect your joints, improve your movement mechanics, and teach your body to handle everyday forces with less friction.
A quick note before we begin
If you have sharp pain, numbness, tingling, swelling that doesn’t improve, or an injury diagnosis, get individualized guidance. For everyone else: start conservative. Bands can be sneaky—light tension can still create a big training effect if you move slowly and deliberately.
What you need
- One light to medium loop band (mini band) for hips and glutes
- One long band (with or without handles) for upper body
- Optional: a sturdy door anchor (or a safe place to anchor the band)
How to use this article
Pick one of these two options:
Option A: 10-minute daily “joint tune-up”
Choose 5 exercises. Do 1–2 sets each.
Option B: 25–30 minute strength session, 3x/week
Do all 10 exercises in two circuits of five.
You’ll feel the difference faster if you repeat the same selections for 2–4 weeks instead of constantly changing things.
The “younger joints” principles (why bands help)
Most joint discomfort isn’t about the joint itself being “old.” It’s often about the surrounding muscles being undertrained, overworked, or poorly coordinated. Bands help because they allow:
- Progressive loading without heavy weights
- Smooth resistance through a range of motion
- Better control at end ranges (where many people feel wobbly)
- Strength for stabilizers (rotator cuff, glute medius, tibialis anterior, etc.)
Think of bands as a way to train your body’s “support staff.” When those muscles do their jobs, joints tend to feel less like they’re carrying the whole company.
1) Banded Pull-Apart (for shoulders that don’t feel fragile)
Why it helps: Strengthens the upper back and rear shoulders—muscles that keep the shoulder joint centered and posture open.
What it targets: Rear delts, mid-back, scapular stabilizers
How to do it:
- Hold a long band in front of you at chest height, arms straight.
- Pull the band apart by squeezing your shoulder blades back and down.
- Return slowly.
Reps/sets: 2–3 sets of 10–15
Make it easier: Use a lighter band or widen your grip.
Make it harder: Pause for 2 seconds with the band fully stretched.
Common mistake: Shrugging. If your shoulders climb toward your ears, you’re letting your traps do what your upper back should.
2) Banded External Rotation (rotator cuff insurance)
Why it helps: The rotator cuff doesn’t get much love until it hurts. This strengthens it before it complains.
What it targets: Rotator cuff, shoulder stability
How to do it:
- Anchor the band at elbow height.
- Elbow tucked to your side, forearm across your stomach.
- Rotate your forearm outward without letting your elbow drift away.
Reps/sets: 2–3 sets of 10–12 each side
Make it easier: Lighter band, smaller range.
Make it harder: Slow the return (3 seconds).
Common mistake: Turning your torso instead of rotating the shoulder. Keep your ribs still.
3) Face Pull (posture correction that actually sticks)
Why it helps: Trains the upper back to pull your shoulders back where they belong—especially useful if you’re at a computer all day.
What it targets: Rear delts, mid traps, external rotators
How to do it:
- Anchor the band at face height.
- Pull toward your face, elbows high, finishing with hands near temples.
- Think “pull and rotate,” not “yank.”
Reps/sets: 2–3 sets of 10–15
Make it easier: Step closer to the anchor.
Make it harder: Pause at the end for 1–2 seconds.
Common mistake: Letting elbows drop. Keep them roughly level with your shoulders.
4) Banded Row (for elbows and shoulders that feel supported)
Why it helps: Rows teach your shoulder blades to move well, which tends to make shoulders and elbows feel less cranky over time.
What it targets: Lats, rhomboids, biceps
How to do it:
- Anchor the band at chest height.
- Pull elbows back toward your ribs.
- Squeeze, then return slowly.
Reps/sets: 2–4 sets of 10–15
Make it easier: Lighter band, stand closer.
Make it harder: Slow eccentric (3 seconds), or add a pause.
Common mistake: Flaring ribs and leaning back. Keep your torso steady.
5) Pallof Press (core stability that protects your back)
Why it helps: A stable trunk reduces unwanted twisting through the spine and hips—less “tweaky” feeling in daily life.
What it targets: Deep core, anti-rotation strength
How to do it:
- Anchor the band at chest height.
- Stand sideways to the anchor, hold the band at your chest.
- Press arms straight out, resisting rotation. Hold briefly.
- Return to chest.
Reps/sets: 2–3 sets of 8–12 each side
Make it easier: Step closer to anchor.
Make it harder: Hold 2–3 seconds at full extension.
Common mistake: Letting hips drift. Keep your stance solid.
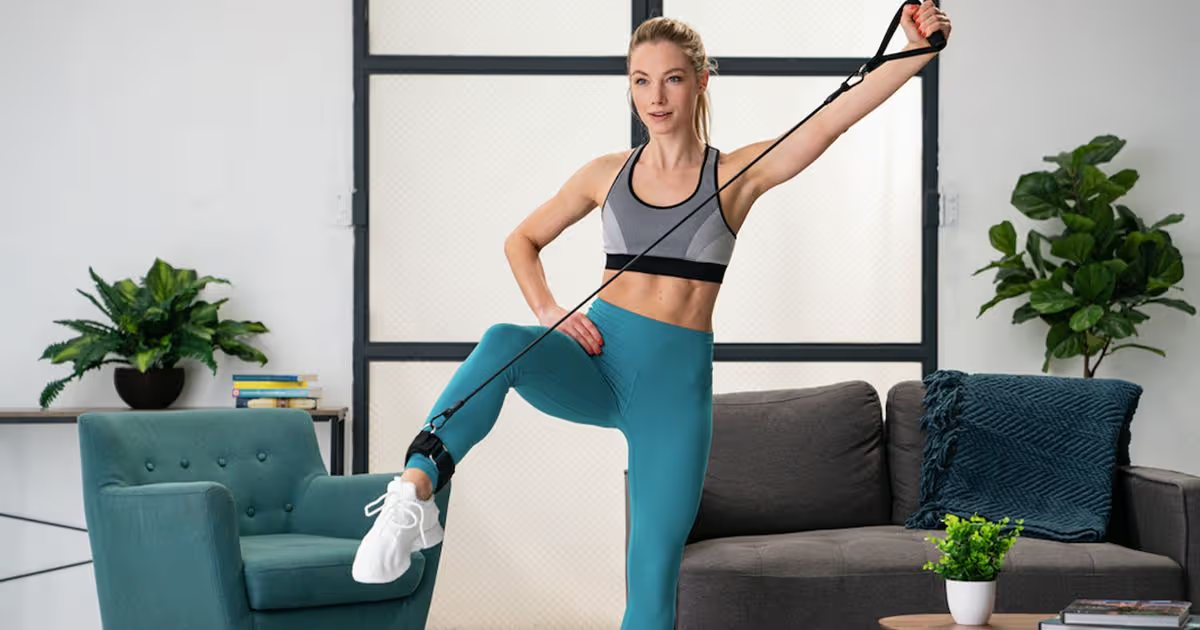
6) Lateral Band Walk (hip stability for knees that complain)
Why it helps: Weak hip stabilizers often show up as knee discomfort—especially with stairs, running, or long walks.
What it targets: Glute medius, hip stabilizers
How to do it:
- Put a mini band above your knees (easier) or around ankles (harder).
- Slight squat, chest up.
- Step sideways slowly, keeping knees tracking over toes.
Reps/sets: 2–3 sets of 8–12 steps each direction
Make it easier: Band above knees, smaller steps.
Make it harder: Band at ankles, slower steps.
Common mistake: Feet dragging together and losing tension. Keep the band loaded.
7) Banded Glute Bridge (hips that feel “springy” again)
Why it helps: Strong glutes offload the lower back and improve hip mechanics.
What it targets: Glutes, hamstrings, pelvic stability
How to do it:
- Mini band above knees.
- Lie down, feet on floor, knees bent.
- Drive hips up while pushing knees gently outward into the band.
- Pause at the top, then lower slowly.
Reps/sets: 2–4 sets of 10–15
Make it easier: No band, or lighter tension.
Make it harder: Hold 2 seconds at the top or do single-leg bridges (advanced).
Common mistake: Overarching the low back. Think “ribs down,” squeeze glutes.
8) Banded Hip Hinge / Pull-Through (hamstrings without heavy weights)
Why it helps: Hip hinging strength supports the spine and hips and makes daily lifting safer.
What it targets: Hamstrings, glutes, posterior chain
How to do it:
- Anchor the long band low behind you (or step on it and hold ends).
- Push hips back like you’re closing a car door with your butt.
- Stand tall by squeezing glutes—not by leaning back.
Reps/sets: 2–3 sets of 10–12
Make it easier: Lighter tension, smaller hinge.
Make it harder: Slow down the lowering.
Common mistake: Bending too much at the knees (turns into a squat). Hinge is hips back.
9) Banded Terminal Knee Extension (TKE) (knee confidence builder)
Why it helps: Strengthens the quadriceps near full extension and helps many people feel steadier during walking and stairs.
What it targets: Quads (especially VMO), knee stability
How to do it:
- Anchor band behind your knee at knee height.
- Step back to create tension so the band pulls your knee slightly bent.
- Straighten the knee by contracting your quad, then return to slight bend.
Reps/sets: 2–3 sets of 12–20 each leg
Make it easier: Step closer to reduce tension.
Make it harder: Add a 1–2 second squeeze at full extension.
Common mistake: Locking hard and snapping the knee. Control it.
10) Banded Ankle Dorsiflexion (the overlooked ankle move)
Why it helps: Ankles are the foundation of walking, running, squatting. If they’re weak or stiff, knees and hips often pay the bill.
What it targets: Tibialis anterior, ankle control
How to do it:
- Sit with your leg extended.
- Loop a band around the top of your foot and hold the ends.
- Pull your toes toward your shin slowly, then return.
Reps/sets: 2–3 sets of 12–20 each side
Make it easier: Lighter band, fewer reps.
Make it harder: Slow eccentric (3 seconds down).
Common mistake: Moving the whole leg. Keep the shin still; move the ankle.
Put it together: Two 30-minute “younger joints” sessions
Session A (Upper body + core)
Warm-up: 3 minutes
- Pull-apart — 2×12–15
- External rotation — 2×10 each side
- Face pull — 2×12–15
- Row — 3×10–15
- Pallof press — 2×10 each side
Optional finisher: 1 minute easy band pull-aparts for posture
Session B (Hips + knees + ankles)
Warm-up: 3 minutes
6) Lateral band walk — 2×10 steps each way
7) Banded glute bridge — 3×12
8) Hip hinge / pull-through — 3×10–12
9) TKE — 2×15–20 each side
10) Ankle dorsiflexion — 2×15–20 each side
Do A and B twice a week each (or just alternate them 3x/week). The results you’re after aren’t dramatic in a single day. They’re cumulative: slightly easier mornings, less stiffness after sitting, joints that stop shouting.
How to choose band tension (without overthinking it)
A band should feel like it gives you a “good fight” in the final third of the movement. If your reps look rushed or sloppy by rep 6, lighten it. If you could do 30 reps without changing facial expression, tighten it.
A simple guide:
- Small stabilizer moves (external rotation, face pulls): lighter band, more control
- Big muscle moves (hinge, bridge, row): medium band, stronger tension
What to expect in 2–4 weeks
You might notice:
- Shoulders sitting lower and feeling more stable overhead
- Hips feeling “switched on” during walking and stairs
- Knees feeling less wobbly in daily movement
- Less low-back tightness after long sitting
These are not miracles. They’re the quiet benefits of training the parts of the body that keep joints feeling supported rather than exposed.
And there’s a subtle psychological shift, too: when your body moves more easily, you stop bracing for discomfort. You move more. You feel better. You move more again. That’s not anti-aging. It’s just a healthier feedback loop.
Important notice: this content is educational and does not replace an individual evaluation. If you have a history of eating disorders, diabetes, pregnancy, or a medical condition, consult a healthcare professional before making dietary or exercise changes.


 Sign In